The design process was a long one. I had to learn about acoustics and studio design first which was great fun. I devoured every book I could get hold of and poured over online forums.

There were many questions which took a while to figure out. The space was a very unconventional shape and so didn.t conform to the usual room mode calculators. As such, I made extensive measurements and experimented with many different speaker positions before the final positions were decided upon.

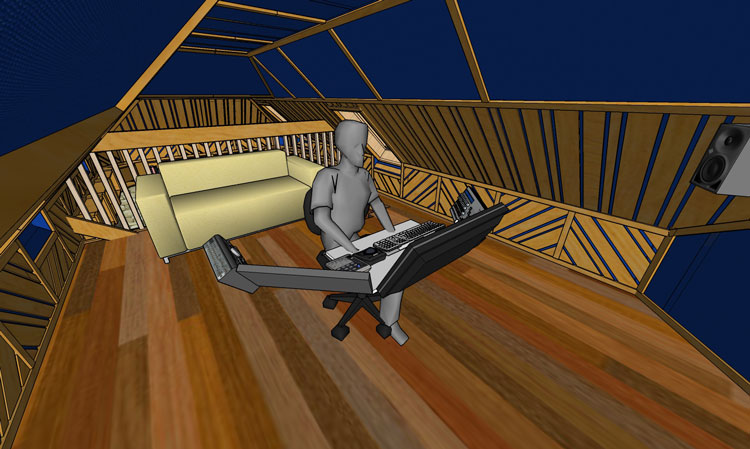
There where some decisions that were arrived at early on. The design was drawn up in sketch-up which in itself, took a long time and resulted in a very complex model. I had decided to go with a one room design. All of my recording experience in the past had been done in make-shift spaces and as such, there were never any control rooms or recording booths. I realised that I liked this setup. Being able to lean over and talk to the talent is much better than being in another room and pushing a button to communicate. It would also keep costs down which was a very important consideration.
All work would be carried out by myself. Again, to keep costs down but also because it is fun!
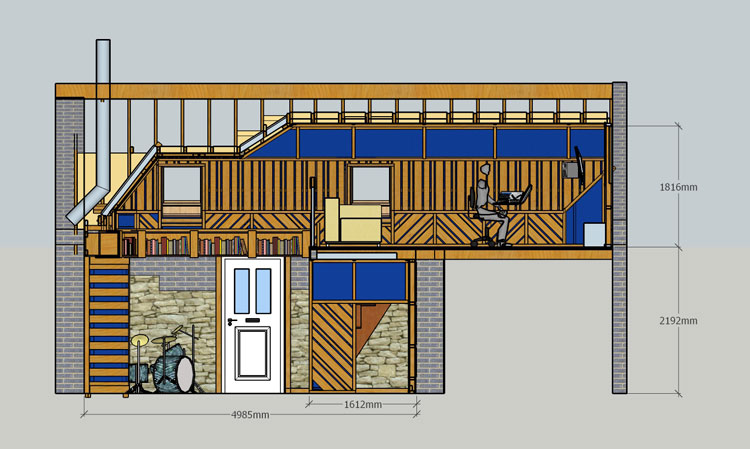
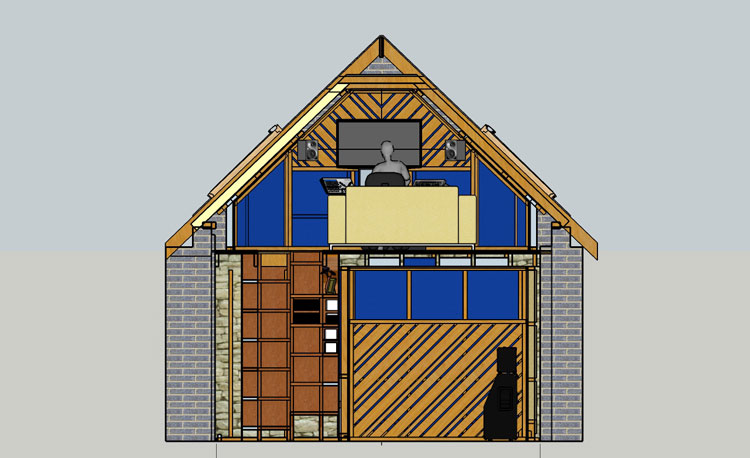
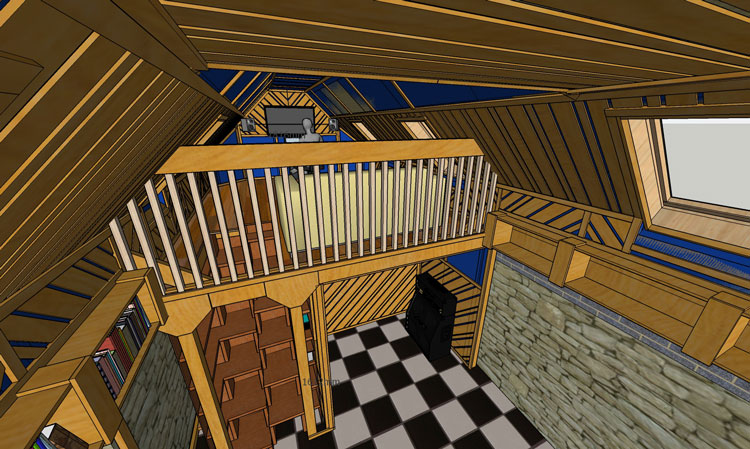
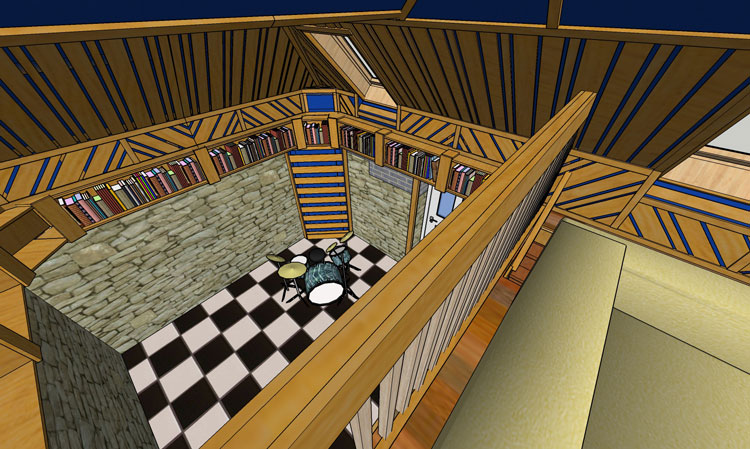
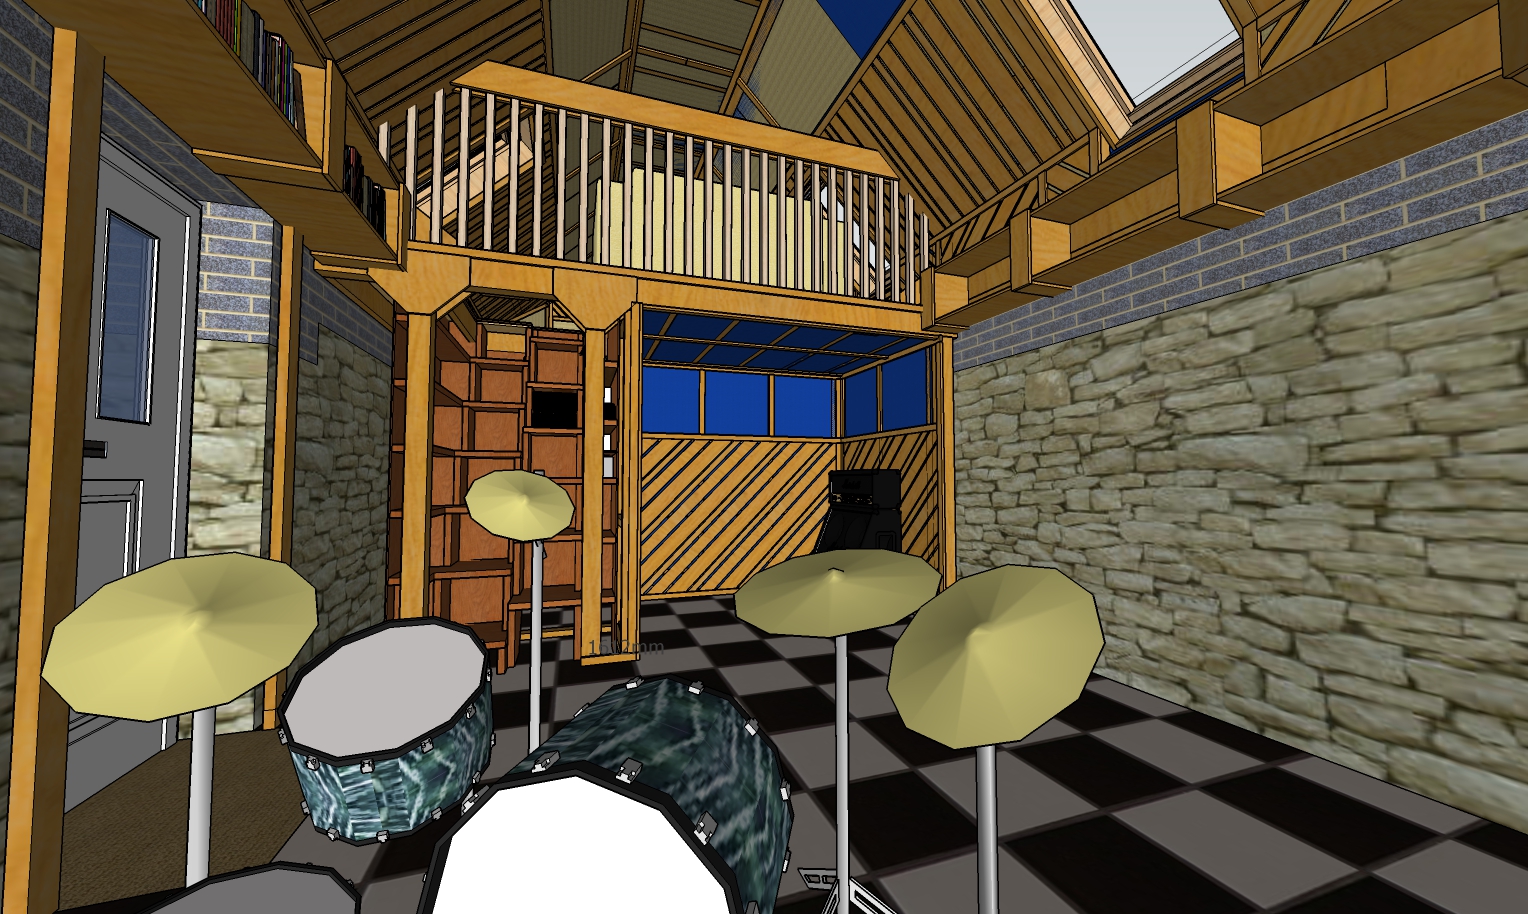
The main Control room would be on the top level which will be extended out into a mezzanine area. Below this area would be the vocal booth. This will sound treated to be quite dead in terms of reverberation. The main area will be the live recording area. The sound will be quite open here with a hard floor and diffused sound coming from the stone walls with deep crevices. The roof will extend to height here of about 3m with sound absorption behind slats arranged in a pattern to provide further diffusion. This should all combine to create a great environment for drum recording which was one of the main aims.
The room underneath the control area will become a workshop. I think it will also be used as a machine romm. I can house the studio computer in this room and then I dont need to build the computer in a way that it is quiet which would cost more money.

The space below the control room was of concern. Vibrations from the speakers needed to be dampened. It was decided to fix 2 layers of plasterboard between each joist, infill with fluffy insulation and then cover with a further layer of plasterboard.
One main issue was how to get up into the mezzanine area. A traditional staircase would have taken up too much space. An elegant solution was arrived at involving an alternating-tread staircase. To add to the design, a bookshelf and storage will be incorporated into this.
The control room area will be quite dead. The angled roof should reflect sounds from the speaker towards the floor. the upper half will be fully absorbent whereas the lower half will feature the same diffusion as present in the live room.
The whole roof will be insulated. This will be followed with a layer of 50mm rockwool RW3 for sound treatment. An acoustically transparent fabric will be placed over this and finally, irregular slats over this. This finish was very much influenced by the designs of Rod Gervais and described (partially) in his excellent book: “Home recording studio: Build it like the pros”
As mentioned in the previous post, Sound isolation was not really included due to the rural nature of the studio. The stone walls were approximately 0.5m thick which will reduce external sound considerably. The main weak point for sound leakage would be the roof.
Although the design was a long process, It had to be done properly and by the end, I was very eager to get building!!!